
This Post is Going to Guide you About the Installation of WordPress Theme using Cpanel or FTP Account. Now I am considering that you have already Install WordPress Theme to your Blog.
If you have not installed it, then visit How to install WordPress—also, assuming that you have already Downloaded the WordPress theme of your choice.
Here is another simple way to install WordPress themes to your Blog (Website). Read the complete guide on How to install WordPress themes.
Now let’s Talk About the Install WordPress Theme Themes using Cpanel.
- Login to your Hosting Cpanel using the User name and Password Provided by your Web Hosting Provider.
- After Login finds File Manager, Click on File Manager and Select Public_Html and Click on to Go Option.
- Now Find the Wp-Content Folder and Click on it, and select the Themes folder.
- Click on the Upload option given on Top, and click on to choose the file option to select the Downloaded WordPress Theme ( Make sure WinRAR Software is already installed on your computer ). If you have not Downloaded the Themes, then you can download them from the WordPress Themes directory.
- After finishing the Above process, Go back to the Themes folder and Reload it. It will show you the uploaded Theme. Select the uploaded article and Right Click on it, and Extract it in the themes folder ( wp-content/themes).
- Go to your website (Blog) Admin Panel (Dashboard); after that, Click on Appearance and select the Themes option; you will see the uploaded themes. Click on it to get the details and preview and click on to install Option to Active the article. If you cannot see the theme name here, check with the Above two steps.
How to Install WordPress Theme using FTP.
To install a WordPress theme using FTP, you must have FileZilla (FTP Software), FTP Access, and WinRAR Software to unpack. Zip File.
- First of all Login to Your Server with the help of FTP Software using your FTP Access ( User name, Hostname, and Password).
- Unpack (Extract) the Downloaded WordPress Theme and upload the Theme into Wp-Content/themes folder.
- To upload the Theme to your server, locate the Folder available in your Local System ( Computer), Right-click on to Folder and Select the upload option (Make sure you are uploading it into Wp-content/themes Directory).
- Go to your Website Admin Panel (Dashboard), click on Appearance and select the Themes option.
- You can see the upload theme there; click on to Theme to get the details and preview and Click on Install to activate the Theme.
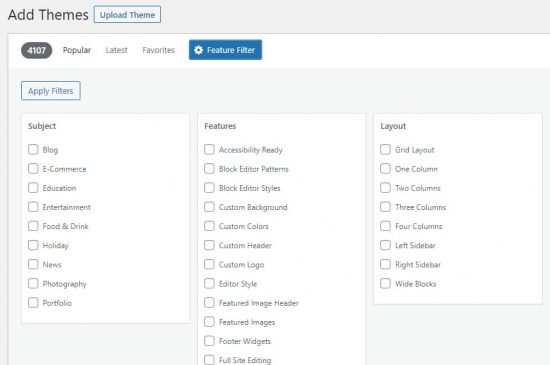
Installing WordPress Themes Using the Theme Directory
A WordPress motif can make your website more attractive and perform better.
1.Log in with WordPress to create an account
Login to access your WordPress account.
2.Navigate towards Appearance > themes

Click on the menu at the left side of the dashboard to hover your mouse. Next, click Appearance to select Themes.
3.Scroll to the top and click Add New on the Themes Page.

4.Choose a theme.
After clicking Add New, you’ll be able to select from the featured themes or most popular themes. Layouts like grid layouts and two-column layouts. Subjects such as blog, eCommerce, or photography.
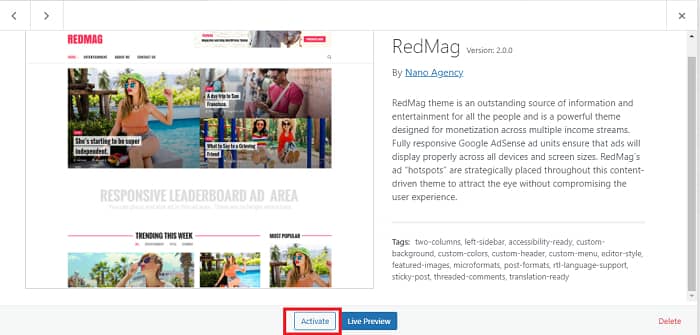
5.Click “Download” to begin the installation
Choose a theme you like and hover over the image to view a preview. To get started installing the theme, either click More Info or Click Download.

6.Click the “Activate” button.
The installation of your theme will take just a few seconds.
I hope you will find it helpful while installing your WordPress theme; if you are facing any problems or have any questions, please comment below. Thank you.
 in Adults and Babies")


 in Adults and Babies")


